
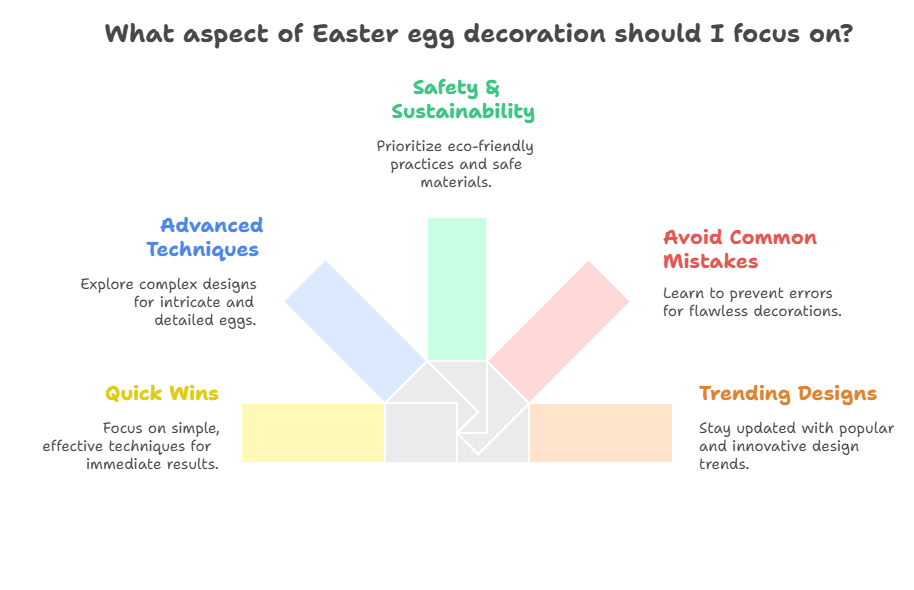
If you’ve ever asked yourself how to make your eggs look gallery-worthy without spending hours, you’re in the right place. In 2025, egg design is bigger than ever—combining classic craft with smart materials, eco-friendly dyes, and even a bit of tech. Whether you’re going minimal, botanical, maximalist, or kid-friendly, this guide will help you plan, create, and photograph egg design that looks stunning and lasts.
We’ll cover the full spectrum—from quick wins to advanced techniques—plus safety, sustainability, and how to avoid common mistakes. And yes, we’ll dive into trending easter egg designs, how to Easter decorate eggs efficiently, and fresh egg ideas Easter fans will love. Ready to roll up your sleeves?
Why Egg Design Still Matters
- It’s tactile and timeless. In a screen-heavy world, hands-on projects feel refreshing.
- It’s customizable. You can match any interior style, party theme, or brand palette.
- It’s shareable. A thoughtful egg spread photographs beautifully for socials or family keepsakes.
Best of all, this craft scales: five eggs for a cozy brunch or fifty for a neighborhood hunt.
The Big Picture: Plan Before You Dye
Great results start with a clear plan. Treat your project like a tiny design sprint:
- Define the vibe: Cottagecore botanicals? Scandi neutrals? Neon pop?
- Choose a palette: Limit to 3–5 colors for cohesion.
- Decide finishes: Matte, satin, or gloss. Metallic accents sparingly.
- Pick a technique: Dye + resist, marbling, decoupage, speckling, or hand-painting.
- Schedule: Hard-boil or blow-out (for keepsakes) the day before. Design the day of.
Pro tip: Do a test egg for any new technique. It will save you time and heartache.
Materials and Tools: What You Actually Need
- Eggs: White for saturated pastels; brown for warm, moody tones. Wooden, ceramic, or papier-mâché eggs for keepsakes.
- Dyes: Food-safe tablets, gel food colors, or natural dyes (onion skins, red cabbage, turmeric, blackberries).
- Resist: Crayon, beeswax, masking fluid, rubber cement, or wax pen.
- Adhesives: Matte Mod Podge, PVA, or decoupage gel.
- Brushes & tools: Fine liner brush, soft round brush, toothpicks, cotton swabs, vinyl stickers, stencils.
- Finishes: Clear matte spray, shellac, or food-safe oil (for sheen on inedible keepsakes).
- Extras: Gold leaf, washi tape, nail polish (for hydro-dip), salt/rice for textures, gloves.
Safety note: If eggs will be eaten, stick to food-safe dyes and skip solvent-based finishes.
Trending Palettes for 2025
- Muted café tones: Latte, biscotti, cocoa, cream.
- Coastal clean: Mist blue, sea glass, foam white, driftwood.
- Bloom-chic: Peony pink, hyacinth, fern, butter yellow.
- Gilded neutral: Stone, clay, bone, whisper gold accents.
- Fresh citrus: Lemon, tangerine, lime, mint.
Create consistency by repeating at least one color across every egg.
Easter Egg Designs: 25 Ideas That Pop
Use this as a swipe file. Mix and match with your palette.
- Botanical imprints (leaf-resist with nylons)
- Marbled inks (alcohol ink or nail-polish hydro-dip)
- Speckled “quail” finish (toothbrush + watered acrylic)
- Minimal line art (one stroke faces, flora)
- Wax-resist pysanky–inspired patterns (beginner-friendly)
- Ombre gradients (dip progressively deeper)
- Calligraphy initials (paint pen or vinyl stencil)
- Terrazzo flecks (multi-color chips on a neutral base)
- Tonal stripes (rubber bands + dye layers)
- Decoupage florals (tissue or napkin layers)
- Gold leaf halos (edge or cap only)
- Pressed flower overlays (seal carefully)
- Checkerboard with thin vinyl tape
- Cloud wash (wet-on-wet watercolor)
- Galaxy eggs (sponged nebula + white splatters)
- Negative polka dots (round stickers before dye)
- Coastal linen texture (dry-brushed threads)
- Wax-drip geometry (beeswax pen, then dye)
- Monochrome matte (chalky paint + satin seal)
- Eggshell mosaic (upcycle cracked shells)
- Lace wrap impressions (soft tie + dye)
- Stamped motifs (eraser-carved shapes)
- Hand-cut paper collars (origami trims)
- Raised dot mandala (dimensional fabric paint)
- “Stone” faux finish (sponge gray tones, matte seal)
Pro tip: Photograph in diffused daylight near a window for buttery highlights and true color.
Easter Decorate Eggs: Step-by-Step Foundations
Here’s a clean, reliable workflow you can reuse for most styles.
- Prep your eggs
- For eating: hard-boil and chill.
- For keepsakes: blow-out (pin-hole both ends, blow, rinse, dry overnight).
- Clean
- Wipe shells with vinegar water to remove oils. Dye takes better.
- Base color
- Mix dye baths. For natural dyes, simmer ingredients 30 minutes, strain, add vinegar.
- Dip until color is 1–2 shades lighter than you want (it deepens as it dries).
- Resist or pattern
- Apply wax, tape, or stickers for crisp shapes. Let dry or set.
- Layering
- Add second dip, speckles, or paint details. Work from light to dark.
- Finish
- Inedible keepsakes: seal with matte or satin spray.
- Edible display eggs: lightly oil with food-safe mineral oil for a soft sheen.
- Display
- Use egg cups, tiny rings of card, or 3D-printed stands for a polished look.
Egg Ideas Easter: 30 Quick Wins Under 15 Minutes
Great when you’re short on time but want big impact.
- Rubber-band stripes + one dye dip
- Sticker mask polka dots + quick dip
- Washi tape wraps (no dye needed)
- Speckle over natural brown eggs
- Metallic paint pen edges only
- Gradient dip using a spoon as a depth stop
- Stencil one motif per egg (leaf, star, heart)
- Dot mandala around the equator
- Tear tiny tissue scraps for terrazzo
- Lace wrap dye (remove for reveal)
- Salt sprinkle dye (crystal texture)
- Rice shake dye (freckled finish)
- Pressed mini fern + decoupage
- Chalk marker doodles on matte paint
- One-word script (Hope, Bloom, Joy)
- Neon tip dip + white body
- Half-dip chic (clean midline)
- Two-tone diagonals with tape
- Tiny star constellation splatter
- Botanical silhouette (sprig + nylon)
- Hydro-dip one swipe, leave negative space
- Newspaper decoupage (seal well)
- Gold-leaf crescent moon detail
- Soft sponge ombre from base to tip
- Pencil sketch underpainting (seal lightly)
- Dye + deboss with soft stamp (very gentle)
- Stamp dates or initials for keepsakes
- Thin twine wrap “nest” glued to base
- Tiny clay pedestal stand
- “Stamped” faux postmark graphic
Ideas Easter Eggs: Advanced Techniques Worth Trying
Ready to level up? These deliver gallery-level results.
- Beginner pysanky: Use a low-temp wax pen to draw lines, dye in stages from light to dark, melt off wax for the reveal.
- Etched shells: Dye, then use a fine abrasive eraser or craft blade to scratch highlights.
- Alcohol ink veining: Drip and move with a drop of isopropyl; seal with spray (inedible).
- Vinyl-cut decals: Cut micro motifs on a Cricut/Silhouette; apply as masks or permanent decor.
- Transfer prints: Laser-print black graphics, apply gel medium, press, and peel for decoupage-like results.
- Eggshell mosaic inlay: Paint base, glue eggshell bits, grout with tinted paste, seal matte.
- Faux porcelain: White base, cobalt line art, gloss seal.
Note: For any solvent-based method, use blown eggs or craft blanks—not food eggs.
Decoration Easter Eggs: Tools, Finishes, and Displays
- Finishes:
- Matte spray: Modern, photo-friendly.
- Satin: Lifts color without glare.
- Gloss: Best for porcelain/faux-ceramic looks.
- Adhesives:
- Mod Podge matte for napkins/tissue.
- PVA for heavier paper and trims.
- Displays:
- Minimal pedestals, moss nests, shallow bowls with lentils/rice, or acrylic risers.
- Label cards for place settings or candy-station “flavors.”
Tip: Keep displays low and clustered; odd numbers photograph better.
Natural Dye Cheatsheet (Beautiful and Low-Waste)
Use kitchen scraps and spices for eco-friendly color. Add 1 tbsp vinegar per cup of dye for better uptake. Steep longer for deeper tones.
| Ingredient | Hue | Notes |
|---|---|---|
| Yellow onion skins | Golden amber | Reliable, rich on white/brown shells |
| Red cabbage | Blue to teal | Turns blue on white eggs; with baking soda, leans teal |
| Turmeric | Bright yellow | Stains—wear gloves; gorgeous and fast |
| Black tea/coffee | Warm tan | Subtle, perfect for neutrals |
| Beet | Soft pink | Gentle; deepen with longer soaks |
| Spinach/parsley | Pale green | Soft, layer twice for depth |
| Blueberries | Dusty blue | Marble if you crush a few berries in the dye |
| Avocado pits/skins | Blush pink | Unpredictable but romantic |
Pro tip: Overnight refrigeration intensifies natural dye colors.
Safety, Food Handling, and Allergies
- Refrigerate boiled eggs within 2 hours and keep below 40°F (4°C).
- If eggs sit out for more than 2 hours during decorating, treat them as display-only.
- Use food-safe dyes if the eggs will be eaten.
- Avoid solvent-based products on edible eggs.
- Allergy-friendly alternatives: Use wooden or ceramic eggs for households with egg allergies.
Sustainability: Make Your Craft Greener
- Dye with kitchen scraps. Compost the solids afterward.
- Use blown eggs for multi-year reuse.
- Choose water-based sealers and low-VOC sprays.
- Upcycle cracked shells into mosaics or soil calcium.
- Store re-usable tools in a clearly labeled “Egg Kit” bin.
Real-Life Example: From “Okay” to “Oh, wow”
“I always bought the standard dye kit and ended up with blotchy pastels. This year I tried botanical imprints with onion-skin dye and a satin seal. I only made a dozen eggs, but the table looked styled by a magazine. My mom thought I’d bought them from a florist.”
The shift? A tighter palette, natural dye depth, and a simple technique that photographs beautifully.
Troubleshooting: Fast Fixes for Common Problems
- Blotchy color: Degrease shells with vinegar water before dyeing.
- Dull finish: Try a satin seal (inedible) or a drop of food-safe oil (edible display-only).
- Bleeding decals: Seal the base first, then decoupage lightly with minimal moisture.
- Broken shells: Patch with a tiny tissue square + PVA, paint over, or pivot to mosaic.
- Color too light: Add time, heat the dye gently, or add a splash more vinegar.
Display and Styling: Make It Instagram-Ready
- Shoot near a bright window with sheer curtains.
- Use neutral backdrops (linen, butcher paper, raw wood).
- Cluster in odd numbers; vary heights with cups and small bowls.
- Add natural props (herbs, blooms, moss) for context.
- Keep edits light—lift exposure and nudge contrast; preserve color truth.
Hosting: A Two-Hour Egg Bar for All Ages
- Pre-dye half your eggs in pale bases.
- Set stations: speckle, stickers, tape, decoupage, and a natural dye corner.
- Offer 3–4 palettes with sample eggs as guides.
- Provide name cards to label each guest’s tray.
- Finish with a shared styling photo board for everyone’s creations.
Great hosting is about constraint: fewer choices, clearer results.
Selling or Gifting? Small-Batch, Big Impact
- Keepsake sets: Wooden or ceramic eggs, hand-painted, stored in a cushioned box.
- Personalization: Initials or dates via vinyl decals or hand lettering.
- Packaging: Shredded kraft, tissue, and a small care card.
- Pricing: Charge for time, artistry, and materials—don’t race to the bottom.
- Legal: For edible items, check local cottage food and labeling rules (often easier to sell non-edible keepsakes).
Tech Assist: Smart Shortcuts You’ll Love
- Vinyl cutters (Cricut/Silhouette) for ultra-crisp masks and letterforms.
- Stencil printers for repeating motifs.
- 3D-printed stands or drying racks (PLA is fine for displays).
- AR preview: Mock your palette and pattern in a design app to test combinations before you start.
Time-Saver Templates
- The one-hour glow-up: Speckle set (brown eggs + black/white speckles + satin finish).
- The two-visit beauty: Day 1 base dye; Day 2 resist lines + deep dye + melt reveal.
- The kid-proof kit: Sticker masks, washi tape, safe markers, and edible dyes only.
Cost Guide (Per Dozen, Approx.)
- Basic food color: $3–$6
- Natural dye (scraps/spices): $2–$8
- Alcohol inks/hydro-dip: $8–$15 (keepsakes only)
- Decoupage + tissue/napkins: $6–$12
- Gold leaf accents: $5–$10 per dozen for highlights
Remember: Fewer eggs, more intention, bigger impact.
FAQs
What are the best easter egg designs for beginners?
Start with sticker masks + a single dye bath, speckled quail finish (toothbrush splatter), or washi tape stripes. These keep control high and mess low, and they photograph beautifully. As confidence grows, try simple wax-resist lines or decoupage.
How do I Easter decorate eggs naturally without food coloring?
Use natural dyes: onion skins (amber), red cabbage (blue), turmeric (yellow), tea/coffee (tan), beets (pink), blueberries (dusty blue), and spinach (pale green). Simmer ingredients with water, strain, add vinegar, and soak eggs until you reach the tint you like.
Can you eat dyed eggs after decorating?
Yes—if you used food-safe dyes, kept eggs refrigerated, and didn’t leave them out for more than 2 hours during decorating. Skip solvent-based products on edible eggs. When in doubt, treat them as display-only.
What are some fresh egg ideas Easter trends for 2025?
Muted café palettes, botanical imprints, soft terrazzo flecks on neutrals, minimal line art, and gentle ombre gradients. For keepsakes, faux porcelain (white base + cobalt line art + gloss seal) is having a moment.
How can I make decoration Easter eggs last for years?
Use blown eggs, wooden/ceramic blanks, or papier-mâché. Stick to water-based paints/adhesives, seal with a matte or satin spray, and store in a padded box away from heat and sunlight.
What’s the difference between easter egg designs with wax and simple dye dips?
Wax-resist (pysanky-inspired) uses beeswax lines to protect underlying colors through multiple dye stages, creating intricate patterns. Simple dye dips are quicker: mask, dip, and remove for cleaner graphic looks with fewer steps.
How do I get a smooth, even finish without streaks?
Degrease shells with vinegar water, submerge fully, and let the dye do the work—avoid brushing liquid directly on shells. Let eggs dry on a rack instead of paper towels to prevent marks.
Are brown or white eggs better for designs?
White eggs make pastels pop and blues truer; brown eggs create rich, moody results and look great speckled or paired with warm metallics. Choose based on your palette.
The Bottom Line
Beautiful egg design doesn’t require perfection or a designer’s budget. It’s about a clear palette, a reliable workflow, and one or two thoughtful techniques. Embrace fluid color, natural dyes, and a couple of modern flourishes, and your eggs will feel curated—not chaotic.
CLICK HERE FOR MORE BLOG POSTS
Liam is a freelance writer, blogger, and digital media journalist. He has a management degree in Supply Chain & Operations Management and Marketing and boasts a wide-ranging background in digital media.